
To pick a phone camera that looks "studio-pretty" and still holds up in real life, judge it by behavior in three stress scenes: backlight, night, and portrait depth. Use this page as a decision tree: match the scene to a capture mode, then accept the specific trade-off (motion blur, noise, HDR halos, or hair-edge errors) that mode creates.
Quick Comparison Summary: Studio vs Real-World Outcomes
- Studio-looking shots usually come from stable light, low motion, and predictable skin tones; real-life scenes punish slow shutter and aggressive processing.
- If you care about มือถือถ่ายรูปย้อนแสงดี, prioritize consistent HDR mapping (faces first) over maximum contrast or "punchy" skies.
- For มือถือถ่ายรูปกลางคืนดีที่สุด, judge motion handling (moving people) more than static detail on buildings.
- For มือถือถ่ายรูปคนสวย โหมดบุคคล, edge quality around hair and glasses matters more than blur strength.
- The "มือถือกล้องสวยที่สุด" for you depends on your main scene: people in motion, neon streets, or bright windows.
- Use a mode strategy, not brand guessing: Auto/HDR vs face-priority metering vs Night mode vs burst.
Controlled Setup and Camera Presets: Recreating Studio Conditions on a Phone
Use these criteria to judge whether a phone that looks great in controlled tests will still look good outside. They also explain why "เปรียบเทียบกล้องมือถือ รุ่นไหนดี" is less about megapixels and more about processing consistency.
- Exposure repeatability: does it keep skin brightness consistent across 3-5 shots without sudden jumps?
- White balance stability: does it avoid green/yellow drift under mixed light (window + tungsten/LED)?
- Face-priority behavior: does it protect faces from becoming silhouettes when a bright background appears?
- Highlight handling: does it clip lamps/sky hard, or roll off smoothly without gray "HDR haze"?
- Shadow recovery style: does it lift shadows cleanly, or create blotchy/painted textures?
- Texture vs smoothing balance: does skin keep pores and fine detail without turning waxy?
- Motion tolerance: does it prefer faster shutter (sharper people) or slower shutter (cleaner noise but blur)?
- Lens switching consistency: do colors/exposure match when moving between main, ultrawide, and tele lenses?
- Focus reliability: does it lock on eyes/face quickly, or hunt in dim interiors?
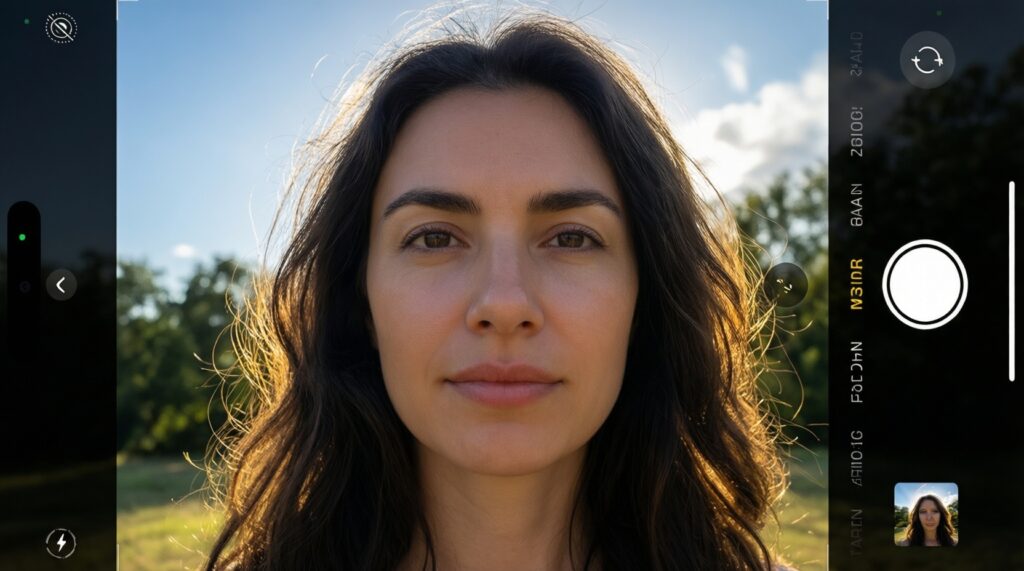
Backlight Challenges: Exposure, Dynamic Range and Recovery Strategies
Backlight is the fastest way to separate "pretty in studio" from "pretty in life." Choose a strategy based on what must look correct: the face, the sky, or both. The options below describe what to try on most phones (names may differ by brand).
| Option | Who it fits | Pros | Cons | When to choose |
|---|---|---|---|---|
| Auto HDR (default camera) | Most users who want a fast, consistent look | Balanced results; minimal effort; decent face protection | Can create HDR halos around hair/edges; sky may look flat | Walking shots, family photos, casual outdoor portraits |
| Face-priority metering (tap face / "face exposure") | People-first shooters | Faces stay bright; reduces silhouette risk | Sky can blow out; bright background may lose structure | Strong window backlight, sunset behind the subject, cafe shots |
| Exposure compensation (EV down) + Auto HDR | Users who want more sky detail without going manual | Protects highlights; improves cloud/sky retention | Faces can darken; shadow lift may increase noise | Scenic portraits where background matters as much as the face |
| Portrait mode with HDR enabled (if available) | Portrait-heavy shooters who still need background control | Separates subject; often keeps face exposure stable | Edge errors (hair, glasses); blur can look cut-out in backlight | Backlit headshots with busy backgrounds (trees, lights) |
| Manual/Pro mode (faster shutter, lower ISO if possible) | Intermediate users who accept extra steps | Predictable exposure; less "HDR weirdness" | Limited dynamic range without multi-frame; can underexpose faces | Consistent series, product shots near windows, controlled portraits |
| Bracket/Best-shot (burst, then pick the best frame) | Parents, street shooters, moving subjects | Higher chance of one clean face frame; avoids blink/motion issues | More sorting later; not always best HDR | Kids running, quick backlit group shots, travel moments |
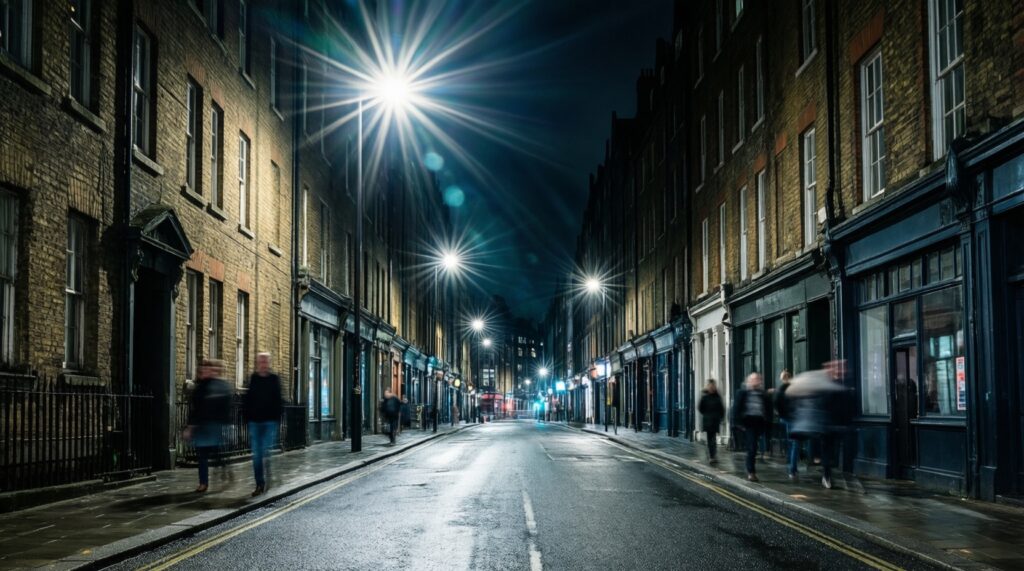
Low-Light and Night Shooting: ISO, Noise Reduction and Sharpness Trade-offs
Night tests reveal the real "cost" of clean images: either slower shutter (blur) or stronger noise reduction (waxy textures). Use these scene-based rules to judge which phone feels like มือถือถ่ายรูปกลางคืนดีที่สุด for your actual usage.
- If people are moving under street lights, then prefer Auto (or a "motion/photo" submode) over full Night mode; accept more noise to keep faces sharp.
- If the scene is static (buildings, signage, skyline), then use Night mode with a stable grip; accept longer capture time to reduce noise and lift shadows.
- If you see neon/LED signs with color smearing, then reduce exposure slightly (EV down) and avoid extreme shadow lifting; accept darker shadows to keep colors clean.
- If indoor light is mixed (warm lamps + cool screens/windows), then lock focus/exposure on the face and correct white balance after; accept slight background color drift rather than green skin.
- If you get repeated blur, then turn on timer (to reduce tap-shake) or use burst; accept more storage use to get one sharp frame.
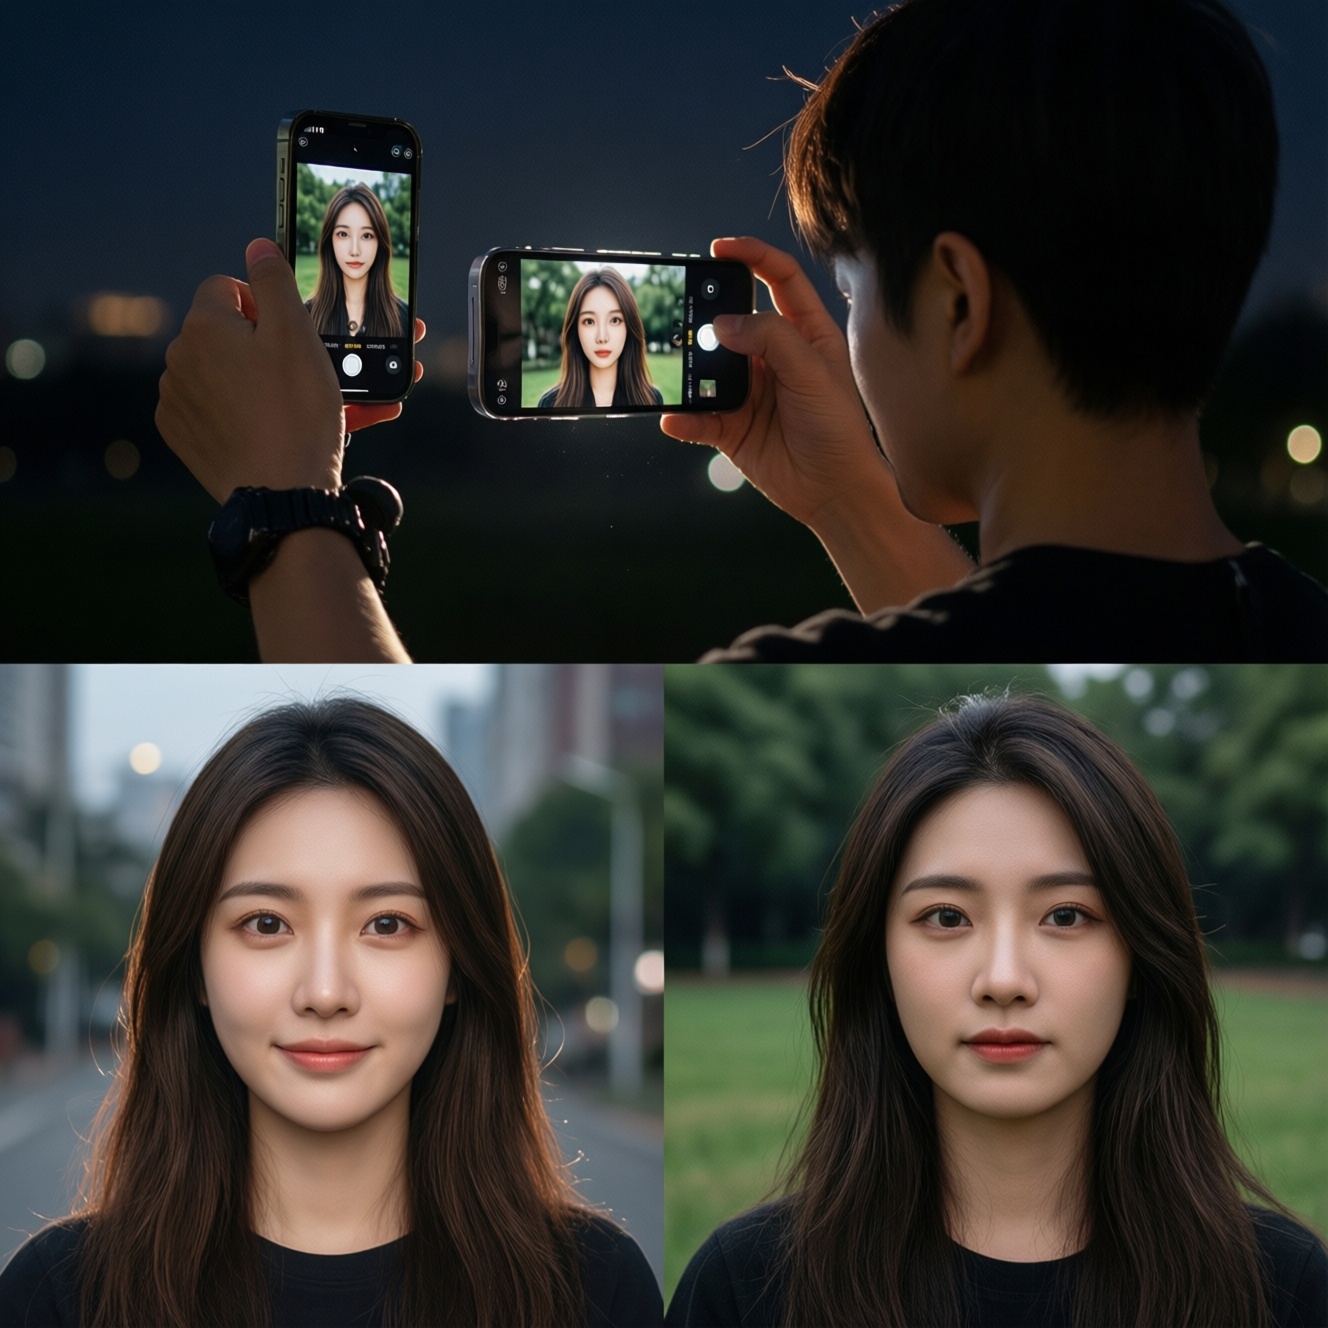
Portrait Mode Deep Dive: Segmentation, Bokeh Quality and Failure Modes
Portrait mode can look "studio" even in messy locations, but it fails in recognizable ways. Use this fast selection algorithm before deciding that one phone is best for มือถือถ่ายรูปคนสวย โหมดบุคคล.
- Start in normal Photo mode and take one frame; use it as a "truth reference" for edges and hair.
- Switch to Portrait mode only if the background is distracting or you need subject separation.
- Check edge-risk: hair flyaways, glasses, hands near face, earrings, and patterned clothing. If risk is high, reduce blur strength or stay in Photo mode.
- Confirm distance guidance (many phones require a sweet spot). If you're too close/far, Portrait may force heavy sharpening or mis-segmentation.
- Scan for classic failure modes: cut-out shoulders, missing ear edges, background bleed into hair, and "double outlines" around the subject.
- If backlight is strong, tap to expose for the face first; then verify the blur edge doesn't glow (HDR halo + bokeh boundary).
- Take 2-3 frames; Portrait errors can vary shot-to-shot because segmentation is probabilistic.
Decision Tree for Mode Selection: Step-by-Step Shooting Choices by Scene
Most "bad camera" complaints come from mode mismatches. Use these as a checklist of frequent selection mistakes to avoid while doing your own เปรียบเทียบกล้องมือถือ รุ่นไหนดี comparisons.
- Using Night mode for moving people, then blaming the phone for blur instead of the long shutter.
- Tapping the bright sky in backlight, making the face too dark, then over-lifting shadows (which amplifies noise and banding).
- Over-trusting HDR: accepting halos around hair, trees, and building edges because the sky looks "saved."
- Using Portrait mode in low light where segmentation gets worse and skin smoothing increases.
- Judging sharpness from a single shot; multi-frame processing can change between shots depending on motion.
- Comparing main camera vs tele/ultrawide without noticing color/exposure mismatches (it changes the "look" more than resolution).
- Zooming digitally at night and mistaking AI sharpening for real detail.
- Letting the phone auto-switch lenses mid-shot (some phones do this); it can change noise, white balance, and dynamic range abruptly.
- Testing only in perfect light and calling it มือถือกล้องสวยที่สุด, then being surprised by real-life backlight or mixed lighting.
Comparative Results Table: Metrics, Visual Samples and How to Read Them
- If the scene is backlit (window/sunset): Auto HDR → if face is dark, use face-priority metering → if sky is critical, EV down slightly.
- If the scene is night with moving people: Auto (no Night) → burst → pick the sharpest face frame.
- If the scene is night and static: Night mode → stabilize (two hands / lean on a surface) → keep exposure modest to protect neon.
- If the scene is portraits: Photo first → Portrait with moderate blur → re-check hair/glasses edges.
Best "studio-like" results usually come from phones that keep exposure and white balance steady and avoid aggressive edge artifacts. Best "real-life" results come from phones that handle motion at night and keep faces usable in backlight, even if that means slightly more noise or less dramatic HDR.
Concise Answers to Practical Mode-Selection Doubts
Why does a phone look amazing in a studio-like setup but struggle outside?
Controlled light reduces dynamic range and motion, so processing looks clean. Outside, backlight and mixed lighting force heavier HDR and noise reduction, where artifacts become visible.
What is the quickest way to test มือถือถ่ายรูปย้อนแสงดี in a shop?
Stand with a bright window behind the subject and shoot 3 frames: Auto HDR, tap-to-expose on the face, and EV down slightly. Compare face brightness, hair edges, and sky clipping.
For มือถือถ่ายรูปกลางคืนดีที่สุด, should I always use Night mode?
No. Use Night mode for static scenes; for moving people, prefer a faster capture (Auto/burst) to avoid motion blur.
How can I judge มือถือถ่ายรูปคนสวย โหมดบุคคล without over-focusing on blur strength?
Look at segmentation around hair, glasses, and hands near the face. Natural edges and consistent skin tone matter more than maximum blur.
Why do HDR photos sometimes show halos around hair and trees?
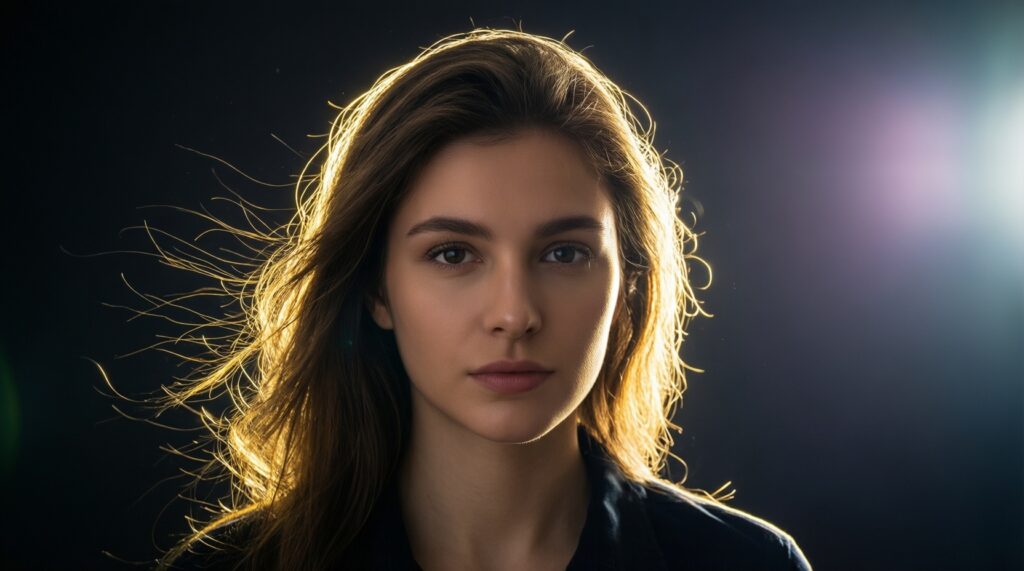
Multi-frame HDR merges exposures and can mis-align fine edges. The result is a bright outline or "glow" where subject and background meet.
When doing เปรียบเทียบกล้องมือถือ รุ่นไหนดี, which single mistake ruins fairness the most?
Comparing different modes without realizing it (Auto vs Night vs Portrait) changes shutter time and processing. Lock the scene, then test modes intentionally.